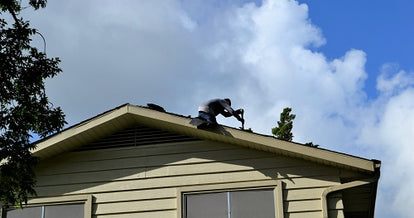
How To Fit Roof Shingles
Posted on 05 July, 2021
How To Fit Roof Shingles
Roofing shingles are a type of roof covering that consists of flat, rectangular tiles overlapping each other. Also known as asphalt or bitumen, they are affordable, easy to install and available in a range of colour options. Roof shingles are the ideal roofing solution for sheds and garden houses, offering a clean finish without compromising on durability or strength.
In this guide, we’re going to look at how to fit roof shingles and the products you need from our roofline range to get the job done.
What You Need:
- Underlay Membrane
- Clout Nails
- Roof Shingles
- Stanley Knife
First things first, preparation!
- Make sure that the area you’re working on has the appropriate underlay roofing membrane.
- Check that you have the right adhesive and fixings to apply the shingles
- Ensure you have the right amount of detail strip
- Make sure the area you’re working on is fully safe before starting
Before you start, take a moment to fully read the manufacturer’s instructions before fitting the roof shingles. If in doubt, consult a professional before starting the project.
Step One: Prepare the roof deck by ensuring it is completely clear of any debris. If you lay your membrane on a surface that isn’t clean, debris will stick to it and create an irregular surface.
Step Two: Lay the underlay membrane. If your roof has a high moisture content, consider looking at breathable membranes to help reduce this. Create overlaps of around 150mm on each edge when laying your membrane, secure by nailing at 100mm with large headed clout nails. This will keep your underlay in place, even in high winds.
Step Three: Attach the detail strips to the eaves and verge of the roof. You can pick up quality detail strips in a range of colours to suit the style of your roof, including slate grey, red and green. Unroll the detail strip and create a 50mm eaves drip edge, nail to your roof deck at 50mm and lay the remaining strip at the verge nailing at 150mm centres with 50mm centre on the face of the verge.
Step Four: Fix the roof shingles to the roof by starting at the eaves and working towards the verge. Keep the shingle tiles square to the eaves and verge at all times to give you a clean finish.
Lay each roof shingle into position to create a ‘broken bond’ pattern and nail into place using a 20mm large headed clout nail. We recommend using 5 fixings per strip for added security. Trim oversized tiles to size with a sharp knife if needed.
Bond the eaves course tile and detail strip with bituminous sealant adhesive before using a heat gun to bond the other tiles to the lower courses.
Step Five: Once all of the shingle tiles are square to the verge line, nail them all into place using 20mm clout nails and bind the shingles to the detail strip using the adhesive. Trim any overhang with the Stanley knife.
Step Six: Once you’re happy that the shingles are laid and fitting to the ridgeline, place detail strip centrally over the ridge. Secure with sealant adhesive and nail in place with 30mm clout nails.
FAQs On Roof Shingles
Some commonly asked questions regarding the fitting of roof shingles.
What Do Shingles Do For A Roof?
Roof shingles are used to prevent water seeping into the property. They are installed after the decking along the roof edge.
Do You Need Underlay For Roof Shingles?
It is recommended to use underlay on roofs that have slopes below 20 degrees. The underlay should be laid with a 15cm end lap, fixed with 10mm clout nails.
How Far Should Shingles Overhang The Drip Edge?
The overhang should be the correct length to avoid blow off during strong winds or water seepage during rainy weather. The shingles should be installed with a 1 inch to 1.5 inch overhang. If you are installing drip edge flashing, you will need a overhang of 0.5 inches to 0.75 inches.
Is It Better To Hand Nail Shingles?
Hand nailing the shingles can provide a more precise placement of the fixing, but you can also use a nail gun if you prefer.
How Many Nails Should Be Used To Fix Each Shingle?
It is recommended to use 4 nails per shingle. If the area experiences high winds, use 6 nails per shingle.
Take a look at our other roofing guides for more info on repairing and building a long lasting roof. We also have a guide on installing Easy Trim Verge U and advice on Dry Verge Installation.
If you have any questions, don’t hesitate to get in touch with a member of the BC Profiles team.