Installation Guide: Easy-Trim Verge U
Posted on 05 July, 2021
Easy-Trim Verge U is an incredibly secure roof installation that, as the name would suggest, is also exceptionally easy to install – but what exactly does the product do and what are the benefits?
What is Easy-Trim Verge U?
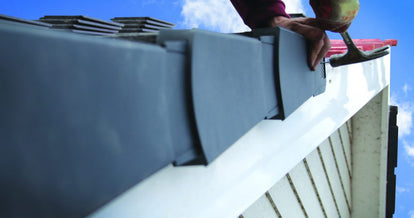
Easy-Trim Verge U is a universal product designed for ease and inclusivity; it’s able to be used with the majority of popular roof tile types, while the units can also be installed on both the left and right-hand sides of your roof verge.
You’ll also find that Easy-Trim Verge U incorporates innovative FlatCap Technology into its design, a feature which uses flexible flaps to contour around the sides of the Verge U, creating an aesthetically pleasing, neat finish as well as many other benefits.
Benefits of Easy-Trim Verge U
- Creates a tight, sealed, wind-resistant fix
- Able to withstand all kinds of weather and UV stable
- Universal handled units fit both sides of your roof verge
- Is able to be installed in any weather condition
- Flexible polypropylene materials allow for quick and easy installation
Easy-Trim Verge U Installation
As aforementioned, Verge U is specifically designed to be easy to install, but to aid in this process, our expert team here at BC Profiles have put together some simple-to-follow Easy-Trim Verge U fitting instructions to help you on your way.
First of all, you’ll need three components from Easy-Trim to complete your installation process:

1. Starter & End Caps
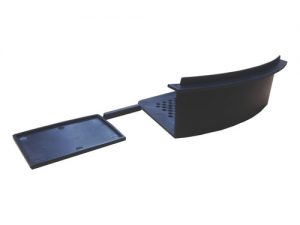
Starter & End Caps include a blanking cap and a verge-end closure, this ensures that your roof verge enjoys a secure and infestation-free fitting that’s easy on the eye too.
2. Verge Unit
Easy-Trim’s unique Universal Verge Unit design allows for the product to be installed on both sides of your roof verge, meaning separate left and right-handed units are a thing of the past.

3. Ridge Caps
Available in Round Ridge Cap (pictured left) and Angled Ridge Cap styles, both products incorporate Easy-Trim’s innovative FlapCap Technology, flexible flaps that contour around the sides of the Verge U system, resulting in a tight, sealed unit.
All the products featured above can be found within our Easy-Trim Universal Verge U System page. Once you’ve purchased the components you’ll need, it’s time to begin the installation process.

Easy-Verge U Dry Verge System Installation
- Step 1: Install your tiling battens over brick or barge board with a 30mm overhang. If you’re in the process of a refurbishment project, you’ll need to remove any existing mortar bedding and install new tiling batten to the underside of the existing batten.
- Step 2: You can now go about laying your tiles flush with the battens. Once again, if you’re conducting a refurbishment project, make sure to remove any existing mortar bedding and install new tiling batten.
- Step 3: Snap the starter kit off of your Starter & End Cap, then starting from the bottom edge of the roof, insert the start piece into the front end of your Universal Verge Unit, marking out the starter piece position on the roof’s fascia and barge board. You can then remove the unit and fix the start piece into position through the design’s grid.
- Step 4: Take the first verge unit and slide it over the tile at the eaves and into the starter kit. Ensure that it’s fitted under the head laps and held firmly in place. Once secure, screw the unit into the batten via the featured top grid.
-
Step 5: Slide the next Verge Unit into the upper edge of the first unit. Make sure to press firmly on the tile, again fitting it underneath the head laps so that the unit is held firmly in place, then nail the unit through the top grid into the batten.
- Step 6: Continue this process up the barge board on both sides of the roof until you reach the ridge. Insert the Round Ridge Cap or Angled Ridge Cap, making sure that the flexible flaps of the Ridge Cap contour around the outside of the last Verge Unit. Once you’re happy, fix the Ridge Cap to the ridge batten.
You should now have all the information that you need to quickly and easily complete your Easy-Trim Verge U installation! If you require any further information on any of the products featured, or more queries on the installation process, please don’t hesitate to contact our friendly team here at BC Profiles.